Now that I have a child in school I LOVE when he brings artwork home. I don't want to be one of the parents who saves everything but I want to for sure look at it for a while. Their minds work hard to create these Masterpieces. I was on Pinterest and came across this very cool idea. I want to do this but not sure where I will display them yet.
I will display art work and then keep important art work in a memory tote for each child.
I also take a picture of all the artwork and then put in a scrapbook for each of the kids.
Parenting can be hard enough but keeping things in order can add to the stress. Throughout this blog I hope to supply you with helpful information and tips to help live a carefree life!
Tuesday, May 31, 2011
Summer Activities
16 days to go before Summer Vacation begins. This will be my first summer home with the kids, besides when I gave birth to Bryson. I am started to compile a calendar of things that are going on around town or places we could go throughout the week.
(I will add more to the list as I get them)
Ideas so far:
- Farmington Hills Splash Pad at Heritage Park (we spent lots of time here last year)- FREE
- Canton Splash Pad- FREE
- Livonia Public Pool- $4 per visit per resident, $7.50 per visit for non-residents
- Detroit Zoo- $12/adults, $8/kids, $5/parking
- Toledo Zoo- $11/adults, $8/kids, $6/parking
- Greenfield Village- $22/adult, $16/kid
- Livonia Library Events
- Nanna's Pool
- Lakes- variety of beaches around the lakes area
- Playgrounds- of course we will be making our rounds to different playgrounds especially within the neighborhood
- Domino's Petting Farm- $5/adult, $4.50/kid
- Kensington Metro Park
- Turtle Cove Aquatic Center- $8/adult, $6/kid- Belleville Lower Huron Metropark
- Ann Arbor Hands-On Museum- $9 ages 2 and up
- Compuware Sports Arena Drive-In Theaters- $9/adults, $6/kids- Sunday through Thursday in Plymouth
- Playdates
- Livonia Spree- June 21-26th
- Plymouth Art In the Park- July 8th-10th
- Mud Day- Tuesday, July 12th - 11:00am-1:00pm at Hines Park-Nankin Mills Area in Westland
- Farmington Founders Festival- July 15th-17th
- Thunder Over Michigan- July 23rd-24th- Willow Run Airport
I found lots of things in the Metro Parent's Going Places magazine that I picked up at the Library.
My new favorite love in life is Pinterest!!! It is a website where you can search all sorts of things that people "pin". I am getting the hang of it.
This is some of the ways Pinterest works: (from their website)
What is Pinterest?
Think of Pinterest as a virtual pinboard — a place where you can create collections of things you love and "follow" collections created by people with great taste.
People use Pinterest to collect and share all sorts of things -- wedding inspiration, favorite T-shirts, DJ equipment. You name it, people are pinning it.
We know you have great taste in something. Our mission is to make Pinterest the best place for you to share your taste with the world.
How do I start pinning?
The easiest way to pin an item is to use the Pin It bookmark. This is a special button that lets you grab an image from any website and add it to one of your pinboards. When you pin from a website, we automatically grab the source link so we can credit the original creator.
You have to be invited to join. If you want to check it out, let me know at salbegs@gmail.com and I will invite you. SO MUCH FUN!!! I just love seeing others ideas and creativity!!!
This is some of the ways Pinterest works: (from their website)
What is Pinterest?
Think of Pinterest as a virtual pinboard — a place where you can create collections of things you love and "follow" collections created by people with great taste.
People use Pinterest to collect and share all sorts of things -- wedding inspiration, favorite T-shirts, DJ equipment. You name it, people are pinning it.
We know you have great taste in something. Our mission is to make Pinterest the best place for you to share your taste with the world.
How do I start pinning?
The easiest way to pin an item is to use the Pin It bookmark. This is a special button that lets you grab an image from any website and add it to one of your pinboards. When you pin from a website, we automatically grab the source link so we can credit the original creator.
You have to be invited to join. If you want to check it out, let me know at salbegs@gmail.com and I will invite you. SO MUCH FUN!!! I just love seeing others ideas and creativity!!!
Funky Vintage Lovely
I found this amazing store through a blog that I follow. You have to check her adorable jewelry out. www.funkyvintagelovely.com
I have ordered a few things and waiting for them to arrive. I also placed an order for Bryson's teacher for the end of the year. I can't wait for them to arrive!!!!
These are my favorite and what I ordered:
I have ordered a few things and waiting for them to arrive. I also placed an order for Bryson's teacher for the end of the year. I can't wait for them to arrive!!!!
These are my favorite and what I ordered:
![]() |
| For me! Love this because one I need this saying and two you can separate them:) |
![]() |
| For me! |
![]() |
| For the Teacher!!! |
Tuesday, May 24, 2011
Menu Board with Apron Hook
I am a big meal planner...I plan every week. They are not always complex meals but they feed the family. I used to print a menu for the frig but I figured there was a way to save time and printing cost. I also had nowhere to put my apron. I would hang it on the coat rack but it was too far away for me to use consistently.
So this is what I came up with.
I bought a picture frame that could be drilled for a hole.
I drilled the whole for the my knob. I just picked out a knob from Home Depot that I liked.
I took a picture of the piece of fabric that I liked one my apron. I put it into IPhoto and then designed my sheet in Powerpoint. Then I printed to make sure it was what I wanted. I LOVE IT!
I put the menu in the frame and hung it on the wall. Now I can use a dry erase marker and write my menu for the week and have my apron in arms reach!!!
It adds a cute touch to the kitchen too!
So this is what I came up with.
I bought a picture frame that could be drilled for a hole.
I drilled the whole for the my knob. I just picked out a knob from Home Depot that I liked.
I took a picture of the piece of fabric that I liked one my apron. I put it into IPhoto and then designed my sheet in Powerpoint. Then I printed to make sure it was what I wanted. I LOVE IT!
I put the menu in the frame and hung it on the wall. Now I can use a dry erase marker and write my menu for the week and have my apron in arms reach!!!
It adds a cute touch to the kitchen too!
Mosquito Plant
So my mother-in-law was at Eastern Market and one of the vendors was telling her about the Mosquito Plant- so I bought a few for outside. This way we can actually enjoy being outdoors this year.
Here is a website with some info about it:
http://www.ehow.com/how_2237704_use-mosquito-plants.html
Sunday, May 22, 2011
Spring Cleaning Week 3
This week was focused a lot on the basement and getting ready for the garage sale.
- Cleaned the upstairs windows
- Declutter Basement
- Got ready for our garage sale- sorted through clothes and toys
- Made a trip to Salvation Army
- Cleaned Refrigerator
- Planted Hostas on the side of the house
- Planted Garden
- Front of the house landscape
Wednesday, May 18, 2011
Tomato, Mozzarella & Basil Salad
I LOVE this yummy combination of foods. It is light and refreshing too.
Ingredients
- 6 small tomatoes (4 medium)
- 1 pound fresh mozzarella
- 10 to 15 basil leaves
- 3 tablespoons good olive oil
- Kosher salt
- Freshly ground black pepper
Directions
Slice the tomatoes and mozzarella and arrange casually with the basil leaves on a large platter. Drizzle with olive oil. Sprinkle with salt and pepper and serve at room temperature.
I like to add some balsamic vinegar too- my fav!
http://www.foodnetwork.com/recipes/ina-garten/tomato-mozzarella-and-basil-salad-recipe/index.html
Spring Cleaning Week 2
A little late on this post but here is what I accomplished last week...yes a little behind schedule but I will get it done.
We were outside a lot this week so the sun took over my life. Next week should be better.
- Wiped down the hallways walls and stairway.
- Cleaned the garage and reorganized- now I still need to get out there and throw away stuff but it looks SO much better. I just have to keep my hubby out to keep it organized:)
- Threw away those miscellaneous toys in the garage.
- Washed and put away all the Winter Gear- GOODBYE!
- Cleaned the downstairs windows
We were outside a lot this week so the sun took over my life. Next week should be better.
Saturday, May 7, 2011
Spring Cleaning Week 1
So I made some progress in my spring cleaning but not in the order I thought I would do them.
- I cleaned out the upstairs bathroom and the linen closet. I threw away old meds, bath toys (my kids like showers now and those toys just get so nasty), scrubbed down the walls and floors, sink and toliet.
- Cleaned and reorganized Keelin's room and closet. Got lots of stuff out of her room for our garage sale.
- Cleaned and reorganized Bryson's room and closet. He wanted to keep SO much stuff but we managed to clean some stuff out for the garage sale plus put away clothes he has grown out of.
- Our room- rearranged and some what cleaned out our closet. Washed ALL our bedding- Mattress Cover, Heated Mattress Cover, Duvet Cover...So refreshing!
- Hallway Closet- Reorganized and washed all our winter gear and put it away for the summer! I still need to get a basket to complete this project for the workout DVDs I have in there.
- Cleaned and reorganized the kitchen and wiped down the cabinets and walls.
- Cleaned and wiped down the walls in the dining room.
Thursday, April 28, 2011
Spring Cleaning Begins in May
Spring is here! Time to do my cleaning to declutter and make my house sparkle:)
Here is my plan of attack:
Week 1 of May- Declutter
Here is my plan of attack:
Week 1 of May- Declutter
- Bathrooom- Clean out drawers, throw away old stuff, organize drawers and linen closet
- Bedrooms- Clean out clothing from dressers and closets
- Living Room and Dining Room- get rid of things that I don't use or relocate them to the appropriate place
- Kitchen- clean out and organize cabinets, clean out food cabinets of expired food
- Closets- organize and get rid of extra belongings
- Bring out summer items and put away winter items
- All Rooms- Wipe down walls, ceiling, fixtures, floors
- Clean all windows
- Flip matresses
- Wash all bedding
- Clean Refrigerator
- Declutter Basement
- Organize Belongings
- Containerize Belongings
- Clean Washer and Dryer
- Paint Basement Stairs
- Clean Windows
- Clean up yard
- Plant garden
- Remove bushes
- Lay grass seed and fertilizer
- Organize/Clean garage
- Clean patio furniture
- Clean outdoor toys
- Get ready for garage sale (if I end up doing it June 4th is our neighborhood sale)
Wednesday, April 27, 2011
Calorie Tracker
I have a friend who told me about this website to track my calories. I have tried other ones before but they just didn't do it for me- too much work. My Fitness Pal has a huge database so you don't have to type in all your information, it is there for you.
Tuesday, April 26, 2011
Monkey Bread
For the moms study group I go to our tables rotate taking snacks each week. So this week I made Pigs In A Blanket and Monkey Bread. The Monkey Bread was delicious and simple. Here is the recipe!
Ingredients
- 1 (3.5 ounce) package cook and serve vanilla pudding mix
- 1/4 cup white sugar
- 1/2 cup brown sugar
- 1 tablespoon ground cinnamon
- 1/2 cup finely chopped pecans (optional)
- 1 cup butter or margarine, melted
- 3 (10 ounce) cans refrigerated biscuits
Directions
- In a plastic bowl with tight-fitting lid, combine pudding mix, sugar, cinnamon and pecans if desired. Pour the butter into a shallow bowl. Cut the biscuits into quarters. Dip several pieces into the butter, then place in bowl; cover and shake. Remove to a greased 10-in. fluted tube pan or a 9 x 13 pan. Continue until all the biscuit pieces are coated. Bake at 350 degrees F for 30-35 minutes. Cool in pan for 30 minutes before inverting onto a serving plate.
Friday, April 22, 2011
Resurrection Rolls
I am going to do these!
Article and Picture FOUND at http://savingdollarsandsense.com/2011/04/06/resurrection-rolls-recipe.html
Easter is just around the corner and as a Christian family it has always been a time of reflection of all that has been done for us.
If you are looking for a fun and simple way to share the message of the cross with even the little members of your family then this recipe is for you!
As parents we need to share our faith with our children at all ages. This recipe is a great way to do just that, and they get to enjoy a yummy treat at the end of the lesson.
I think this is a great tradition to add to your Easter time celebrations that takes the focus off the eggs and chocolate bunnies for a while and puts it right where it belongs!
http://savingdollarsandsense.com/2011/04/06/resurrection-rolls-recipe.html
Here are my Resurrection Rolls- they were super fun and delicious too!!!
Some of them didn't seal up so well but the ones that did and did not leak the marshmallow were perfect!
They were empty!
Article and Picture FOUND at http://savingdollarsandsense.com/2011/04/06/resurrection-rolls-recipe.html
Easter is just around the corner and as a Christian family it has always been a time of reflection of all that has been done for us.
If you are looking for a fun and simple way to share the message of the cross with even the little members of your family then this recipe is for you!
As parents we need to share our faith with our children at all ages. This recipe is a great way to do just that, and they get to enjoy a yummy treat at the end of the lesson.
Resurrection Rolls
Ingredients1 package Cresent rolls
melted butter
large marshmallows
cinnamon
sugar
Directions:melted butter
large marshmallows
cinnamon
sugar
Preheat oven to 350 degree
Give each child a triangle from the cresent rolls
The cresent roll represents the cloth that Jesus was wrapped in
Give each child a marshmallow.
This represents Jesus and His purity.
Have child dip the marshmallow in melted butter.
This represents the oils of embalming.
Dip the buttered marshmallow in the cinnamon and sugar.
This represents the spices used to annoint the body of Jesus.
Wrap the coated marshmallow tightly in the cresent roll
(not like a typical cresent roll up, but bring the sides up and seal the marshmallow inside, otherwise the marshmallow will leak out.)
This represents the wrapping of Jesus’ body after death.
(not like a typical cresent roll up, but bring the sides up and seal the marshmallow inside, otherwise the marshmallow will leak out.)
This represents the wrapping of Jesus’ body after death.
Place in a 350 degree oven for 10 to 12 minutes.
The oven represents the tomb
When the rolls have cooled slightly, the children can open their rolls (cloths) and discover that Jesus is no longer there,
HE IS RISEN!
The marshmallow melts and the cresent roll is puffed up,
but like the tomb - IT IS EMPTY!
I found another recipe that is completely home made and doesn’t use refrigerated cresent rolls. This may work better for those of you who already have the simple ingredients on hand. You can find the recipe here.but like the tomb - IT IS EMPTY!
I think this is a great tradition to add to your Easter time celebrations that takes the focus off the eggs and chocolate bunnies for a while and puts it right where it belongs!
http://savingdollarsandsense.com/2011/04/06/resurrection-rolls-recipe.html
Here are my Resurrection Rolls- they were super fun and delicious too!!!
Some of them didn't seal up so well but the ones that did and did not leak the marshmallow were perfect!
They were empty!
Saturday, April 16, 2011
Recipe: Rocky Top Brownies
I want to try these and haven't had the chance too. Rocky Top Brownies- found in the Southern Living Kids Cookbook.
I rented my cookbook from the library after seeing it at a friends house. We love it!
ROCKY TOP BROWNIES
- YIELD: Makes 32 brownies
- PREP TIME:10 MINUTES
- BAKE:25 MINUTES
Ingredients
- 1 (19-ounce) package brownie mix
- 1/2 cup butter, melted
- 3 large eggs
- 1 (13-ounce) package miniature chocolate-covered peanut butter cups, coarsely chopped
Preparation
- Preheat oven to 350 degrees
- Stir together first 3 ingredients until blended. Spoon batter into a greased and floured 13- x 9-inch pan.
- Bake at 350° for 23 minutes or until center is set.
- Remove from oven, and sprinkle brownies evenly with chopped candy. Return to oven, and bake 2 minutes.
- Remove from oven, and cool completely on a wire rack. Cut brownies into squares.
http://www.myrecipes.com/recipe/rocky-top-brownies-10000001144180/
Friday, April 15, 2011
Color Wheel Meals Blog
My friend Samantha has a great blog. I was just looking through it all and is amazed at her discipline for healthy eating. I just love her stuff! She has encouraged me to add more fruits and vegetables to my kids diet but to mine as well. Check it out!
Here is a link to her About Me page:
http://rawkinmom.wordpress.com/about-me/
Here is a link to her About Me page:
http://rawkinmom.wordpress.com/about-me/
Recipe: Easy Fettuccini Alfredo
Easy Fettuccini Alfredo
Ingredients:
- 1 (8 oz) pkg. cream cheese
- 1 (4 oz) cup shredded Parmesan Cheese
- 1 stick (1/2 cup) butter
- 1/2 cup milk
- 8 oz. cooked fettuccini noodles, cooked and drained
Add Grilled Chicken if you want!
Thursday, April 14, 2011
Recipe: Caramel Apple Dip
A family friend makes this delicious Caramel Apple Dip. She was featured in our local paper for it and once you eat it you will know why.
This doesn't turn out well (is very lumpy) if you use FF cream cheese. You can use light cream cheese.
If you have a small electric food chopper, that works great for chopping the peanuts, you want them very fine.
- 1- 8 oz. Cream Cheese, soften
- 3/4 cup brown sugar
- 2 teaspoons vanilla
- 1 cup chopped lightly salted skinless peanuts
This doesn't turn out well (is very lumpy) if you use FF cream cheese. You can use light cream cheese.
If you have a small electric food chopper, that works great for chopping the peanuts, you want them very fine.
Recipe: Waldorf Salad
A very yummy salad that I used to say to my mom, "that is so gross"- now I love it!
Desired Amount of:
Dressing:
Add dressing amount you desire to the Ingredients.
Desired Amount of:
- Apples (small bite size pieces)
- Grapes (cut in half)
- Celery (Diced)
- Walnuts
Dressing:
- Hellman's Mayo (I use light)
- Sugar to taste
- Cinnamon to taste
- Drops of milk (make consistency you like, don't make it to runny, as it will thin out as it gets mixed into the salad)
Add dressing amount you desire to the Ingredients.
Wednesday, April 13, 2011
Recipe: Simple Nut Mix
Here is a simple nut mix that my mother-in-law makes and it is yummy!
In a small bowl add egg white and water. Whisk until frothy.
Add Almonds to coat
Toss almonds with sugar, cinnamon and salt.
On a greased baking sheet, place a single layer of Almonds.
Bake at 225 degrees for 1 hour. Rotate every 20 minutes
After almonds cool, add walnuts and cranberries and mix. Store in an air-tight container.
- 1 pound Almonds, plain
- 1 pound Walnuts
- 1 bag of Dried Cranberries or Cranberry/Orange from Trader Joe's
- 1 egg white
- 1 tespoon water
- 1 cup sugar
- 2 teaspoons Cinnamon
- 1 teaspoon salt (optional)
In a small bowl add egg white and water. Whisk until frothy.
Add Almonds to coat
Toss almonds with sugar, cinnamon and salt.
On a greased baking sheet, place a single layer of Almonds.
Bake at 225 degrees for 1 hour. Rotate every 20 minutes
After almonds cool, add walnuts and cranberries and mix. Store in an air-tight container.
Recipe: Ravioli Lasagna
Ravioli Lasagna
Recipe Ingredients
- 1 jar (26 oz) triple mushroom pasta sauce
- 2 bags (13 oz each) frozen square cheese ravioli, thawed
- 1 1⁄2 cups shredded Italian cheese blend
Recipe Preparation
1. Heat oven to 375°F. Coat a 9-in. square baking
2. Spread 1 cup sauce in dish. Top with 20 ravioli (or 1⁄3 of the total), flat sides up andjust touching each other. Spread with 3⁄4 cup sauce; sprinkle with 1⁄2 cup cheese.
3. Repeat layers once. Top with remaining ravioli, sauce and cheese. Cover tightly with foil, sprayed side down.
4. Bake on a sheet of foil (to catch any drips) 1 hour or until bubbly around edges. Uncover and bake 5 minutes until cheese is barely golden.
My mother-in-law made this for my birthday and she brought frozen spinach, let it thaw and added it to the layers. It was simple and delicious!
http://www.womansday.com/Recipes/Ravioli-Lasagna
Recipe: Meat Loaf Miniatures
I am not a big fan of meatloaf but a friend brought this to me after we had Kee Kee and I feel in love with it. Now that I don't eat meat I just make it for the family.
Meat Loaf Miniatures
Ingredients
Press meat mixture into 18 muffin cups (about 1/3 cup each). Bake at 375 degrees for 18-20 minutes. Drizzle with reserved ketchup mixture; bake 10 minutes longer or until meat is no longer pink and a meat thermometer reads 160 degrees.
Server desired number of meat loaves. Cool remaining loaves; freeze. Transfer to freezer bags; freeze for up to 3 months.
To use frozen meat loaves: Completely thaw in the refrigerator. Place loaves in a greased baking dish. Bake at 350 degrees for 30 minutes or until heated through, or cover and microwave on high for 1 minute or until heated through.
**You could probably do this as a big loaf too. Sometimes mine do fall apart but they are delicious!
Here is a link to the recipe as well: http://www.tasteofhome.com/Recipes/Meat-Loaf-Miniatures
Meat Loaf Miniatures
Ingredients
- 1 cup of Ketchup
- 3 to 4 tablespoons packed brown sugar
- 1 teaspoon ground mustard
- 2 eggs, beaten
- 4 teaspoons Worcestershire Sauce
- 3 cups Crispix Cereal, crushed
- 3 teaspoons onion powder
- 1/2 to 1 teaspoon seasoned salt
- 1/2 teaspoon garlic powder
- 1/2 teaspoon pepper
- 3 pounds of lean ground beef
Press meat mixture into 18 muffin cups (about 1/3 cup each). Bake at 375 degrees for 18-20 minutes. Drizzle with reserved ketchup mixture; bake 10 minutes longer or until meat is no longer pink and a meat thermometer reads 160 degrees.
Server desired number of meat loaves. Cool remaining loaves; freeze. Transfer to freezer bags; freeze for up to 3 months.
To use frozen meat loaves: Completely thaw in the refrigerator. Place loaves in a greased baking dish. Bake at 350 degrees for 30 minutes or until heated through, or cover and microwave on high for 1 minute or until heated through.
**You could probably do this as a big loaf too. Sometimes mine do fall apart but they are delicious!
Here is a link to the recipe as well: http://www.tasteofhome.com/Recipes/Meat-Loaf-Miniatures
Recipe: Tortilla Tuilles
I love this recipe! So yummy after a meal! This is from a Woman's Day magazine and I found the recipe again online. I added my own words too!
2. Cut twenty-eight 8 x 1/2-in. strips from paper. Spray both sides of tortillas with nonstick spray; place in a single layer on wax paper. Lay paper strips on tortillas; sprinkle each tortilla with 3⁄4 tsp cinnamon sugar. Carefully lift off strips. Center a tortilla, cinnamon-sugar side down, over each foil ball. Gently press tortilla around foil to shape.
I just cover the whole thing with cinnamon so I don't do the stripes
3. Bake 11 to 13 minutes until lightly browned and crisp. Remove tortillas from foil with tongs to a wire rack to cool.
4. To serve: Drop scoops of frozen yogurt into tuilles. Garnish with fresh mint sprigs, if desired.
http://www.womansday.com/Recipes/Tortilla-Tuilles
Tortilla Tuilles
Recipe Ingredients
- 4 fajita-size (6- to 7-in.) flour tortillas
- 3 tsp cinnamon sugar
- 1 pt vanilla-raspberry swirl frozen yogurt or whatever ice cream you choose
Recipe Preparation
1. Heat oven to 375°F. Crumple each of four 20-in. strips of foil into a ball; place on a foil-lined cookie sheet.2. Cut twenty-eight 8 x 1/2-in. strips from paper. Spray both sides of tortillas with nonstick spray; place in a single layer on wax paper. Lay paper strips on tortillas; sprinkle each tortilla with 3⁄4 tsp cinnamon sugar. Carefully lift off strips. Center a tortilla, cinnamon-sugar side down, over each foil ball. Gently press tortilla around foil to shape.
I just cover the whole thing with cinnamon so I don't do the stripes
3. Bake 11 to 13 minutes until lightly browned and crisp. Remove tortillas from foil with tongs to a wire rack to cool.
4. To serve: Drop scoops of frozen yogurt into tuilles. Garnish with fresh mint sprigs, if desired.
http://www.womansday.com/Recipes/Tortilla-Tuilles
Tuesday, April 12, 2011
Recipe: Yummy Mostaccioli
This is one of my favorite and easy recipes to make! Great for large groups too.
Mostaccioli
- 1- One Pound Box of Mostaccioli Noodles
- ½ to 1 pound of Hamburger
- 1- 28-32 oz meatless Spaghetti Sauce- Prego Traditional
- 1 heaping Tablespoon of Sugar
- ½ cup of Water
- Approx. 1 pound of Mozzarella Cheese
- Approx. ¼ pound of Parmesan Cheese
Boil noodles until tender firm. Brown hamburger, drain, add sauce, sugar, water and heat up. Mix drained noodles with ¾ of the sauce. Put in bottom of sprayed 9 x 13 pan. Top with generous amount of cheeses. Add rest of noodle mixture. Top with rest of sauce and cheeses. Bake at 375 degrees uncovered for 30 minutes.
Monday, April 11, 2011
Tips To Make Meals & Snacks Easier Throughout The Week
How many times have you thrown away food because it went bad, especially produce? You buy it at the store and have good intentions on eating all of it. What is the hold back from eating it?
For me it was the prep it took before you could eat it!
Here are some tips that have helped me have better weeks with food:
1. Make your grocery list and be practical about how much you are buying. If you don't buy enough you can always go back to the store. If you buy too much you waste the food.
2. For produce, when you get home, cut and prepare those items that can be. Clean and cut your peppers, onions, strawberries, grapes, cucumbers...If it is ready to eat you will likely eat it. If you have to do the prep work and eat more likely you won't do it when you want the snack. Prep your stuff for dinners too. I had so many times when it came time for dinner and I was tired the last thing I wanted to do was clean, cut/chop...so then I would just do something easy instead of something healthy.
3. Put out some veggies and fruits and let the kids snack on them throughout the day. My kids love helping themselves when it is out on the counter for them.
4. For snacks, buy some snack baggies and place snacks in the baggies so the kids or you can just grab and go. This will also help you control portion sizes. My kids think they need a whole sandwich baggie full of whatever snack they choose and I end up throwing half the bag away. What a waste. So I can handle portion control with the snack baggies prepared. A friend of mine using one of her draws in the frig for snacks the kids can eat whenever.
I do all my food prep when I get home from the grocery store so then I have no excuses!
For me it was the prep it took before you could eat it!
Here are some tips that have helped me have better weeks with food:
1. Make your grocery list and be practical about how much you are buying. If you don't buy enough you can always go back to the store. If you buy too much you waste the food.
2. For produce, when you get home, cut and prepare those items that can be. Clean and cut your peppers, onions, strawberries, grapes, cucumbers...If it is ready to eat you will likely eat it. If you have to do the prep work and eat more likely you won't do it when you want the snack. Prep your stuff for dinners too. I had so many times when it came time for dinner and I was tired the last thing I wanted to do was clean, cut/chop...so then I would just do something easy instead of something healthy.
3. Put out some veggies and fruits and let the kids snack on them throughout the day. My kids love helping themselves when it is out on the counter for them.
4. For snacks, buy some snack baggies and place snacks in the baggies so the kids or you can just grab and go. This will also help you control portion sizes. My kids think they need a whole sandwich baggie full of whatever snack they choose and I end up throwing half the bag away. What a waste. So I can handle portion control with the snack baggies prepared. A friend of mine using one of her draws in the frig for snacks the kids can eat whenever.
I do all my food prep when I get home from the grocery store so then I have no excuses!
Organizing Meal Idea
Here is a blog that I follow who put up an idea for Meal Organizing.
http://audreycaroline.blogspot.com/2011/04/organization-not-my-strong-suit.html
I am not sure if this way would work for me because I use lots of same things for breakfast and lunch as well as dinner. My friend, Kara (who set me this blog), were emailing and we were thinking well our frig isn't big enough but maybe it could work with one or two bins and you fill them the night before or in the morning.
I thought of one thing that would be a perk to doing meals this way is that your family won't eat items that you need for the meals throughout the week. Maybe not put condiments in the bins but all the perishable items.
http://audreycaroline.blogspot.com/2011/04/organization-not-my-strong-suit.html
I am not sure if this way would work for me because I use lots of same things for breakfast and lunch as well as dinner. My friend, Kara (who set me this blog), were emailing and we were thinking well our frig isn't big enough but maybe it could work with one or two bins and you fill them the night before or in the morning.
I thought of one thing that would be a perk to doing meals this way is that your family won't eat items that you need for the meals throughout the week. Maybe not put condiments in the bins but all the perishable items.
Homemade On The Go Meals
I was reading my Family Fun Magazine this month and I loved this little idea that was in there. This mom makes her own On The Go Meal when traveling instead of stopping at Fast Food Places. Love the idea!!!
Here is the link to read the article:
http://familyfun.coverleaf.com/familyfun/201104/?pg=51&pm=2&u1=friend#pg51
Here is the link to read the article:
http://familyfun.coverleaf.com/familyfun/201104/?pg=51&pm=2&u1=friend#pg51
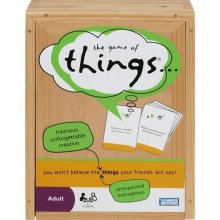
A Game of Things
If you haven't tried this game you should...
I was introduced to this game by my sister-in-law at Christmas. We played it with my husbands family along with my 7 year old niece which I thought was fun that she could join in with us.
We just played it with a group of about 12 the other night and we laughed so hard. Ages who played we as young as 10 years old all the way through adults. I don't want to share too much about the game because I don't want to ruin your first experience.
You will learn some crazy things about people and enjoy a great time of laughing. Great game for Game Night!!!
I was introduced to this game by my sister-in-law at Christmas. We played it with my husbands family along with my 7 year old niece which I thought was fun that she could join in with us.
We just played it with a group of about 12 the other night and we laughed so hard. Ages who played we as young as 10 years old all the way through adults. I don't want to share too much about the game because I don't want to ruin your first experience.
You will learn some crazy things about people and enjoy a great time of laughing. Great game for Game Night!!!
Sunday, April 10, 2011
Trader Joes Dripless Candles
I LOVE these candles from Trader Joes. They are perfect for your table. 8 per pack for $3.00- Taper type candles with no drip. They burn for a long time too!
Here is a blog where some wrote about them as well:
http://www.retireinstyleblog.com/2010/01/perfect-dripless-candle-trader-joes.html
Here is a blog where some wrote about them as well:
http://www.retireinstyleblog.com/2010/01/perfect-dripless-candle-trader-joes.html
Saturday, April 9, 2011
Easter Bunny Cupcakes
Easter is coming fast!!! I love Easter and all the celebration that comes with this special day. Jesus' death and resurrection, Welcoming of Spring and Warm weather, Egg Hunts, Easter Baskets, time with family, cute Easter clothes and of course yummy food.
I received an email from Family Fun with this fun recipe on it. Here is the link and it is a short video on how to make these Fun Easter Bunny Cupcakes
Subscribe to:
Posts (Atom)